This guide walks you through deploying a Public Key Infrastructure (PKI) using Microsoft Active Directory Certificate Services (AD CS). It follows the industry-standard two-tier Certificate Authority (CA) hierarchy, providing a secure and scalable foundation for issuing and managing digital certificates.
What is PKI?
Public Key Infrastructure (PKI) is a framework that uses digital certificates and cryptographic keys to establish trust between users, devices, and services. It helps verify that a website, person, device, or application is genuinely who it claims to be, enabling secure authentication, encryption, and digital signing.
Two Tier PKI architecture
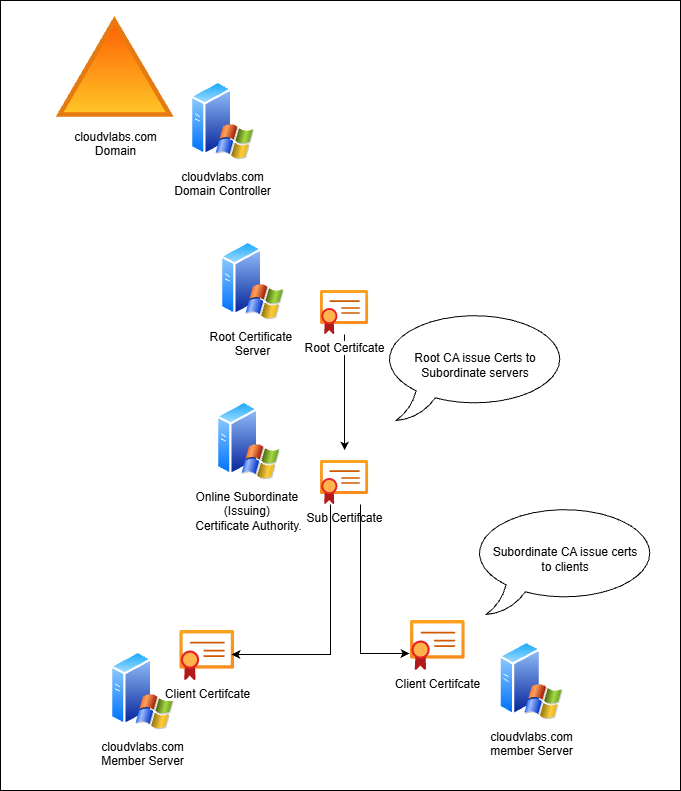
The hierarchy consists of:
A two-tier Certificate Authority (CA) hierarchy is Microsoft’s recommended PKI design for most organizations. It separates the root of trust from the certificate issuing process, improving both security and manageability.
- Online Subordinate (Issuing) Certificate Authority – The server responsible for issuing, renewing, and revoking certificates for users, computers, and services within the organization.
- Root Certificate Authority (Root CA) – The offline, highly secured trust anchor that signs and validates subordinate Certificate Authorities.
Deployment Topology
High Level Deployment Requirements
Before deploying the PKI infrastructure, ensure your environment meets the necessary prerequisites. This includes having an Active Directory domain, supported Windows Server operating systems, appropriate administrative permissions, DNS name resolution, and network connectivity between servers. You should also identify the servers that will host the Root Certificate Authority (CA) and the Issuing CA, define certificate validity and security requirements, and ensure backups and recovery procedures are planned. Meeting these requirements helps provide a secure, reliable, and well-managed PKI deployment.
Tier 1 – Deploying Offline Root CA consist of:
- Install Active Directory Certificate Services (AD CS)
- Configure as a Standalone Root Certification Authority.
- Generate the Root CA certificate and private key.
- Issue the CA certificate used by the subordinate (issuing) CA.
- Publish the Root CA certificate and Certificate Revocation List (CRL).
- Keep the Root CA offline except when, renewing the subordinate CA certificate and Publishing a new CRL
Tier 2 – Deploying Enterprise Issuing CA consist of
- Install Active Directory Certificate Services (AD CS)
- Configure as an Enterprise Subordinate Certification Authority
- Submit its certificate request to the offline Root CA.
- Install the signed subordinate CA certificate from the Root CA.
- Configure Web Enrollment location
- Publish Root Public Certificate in Active Directory to Establish Trust
Space
Root Certificate Server. Installing the AD CS Role Part 1
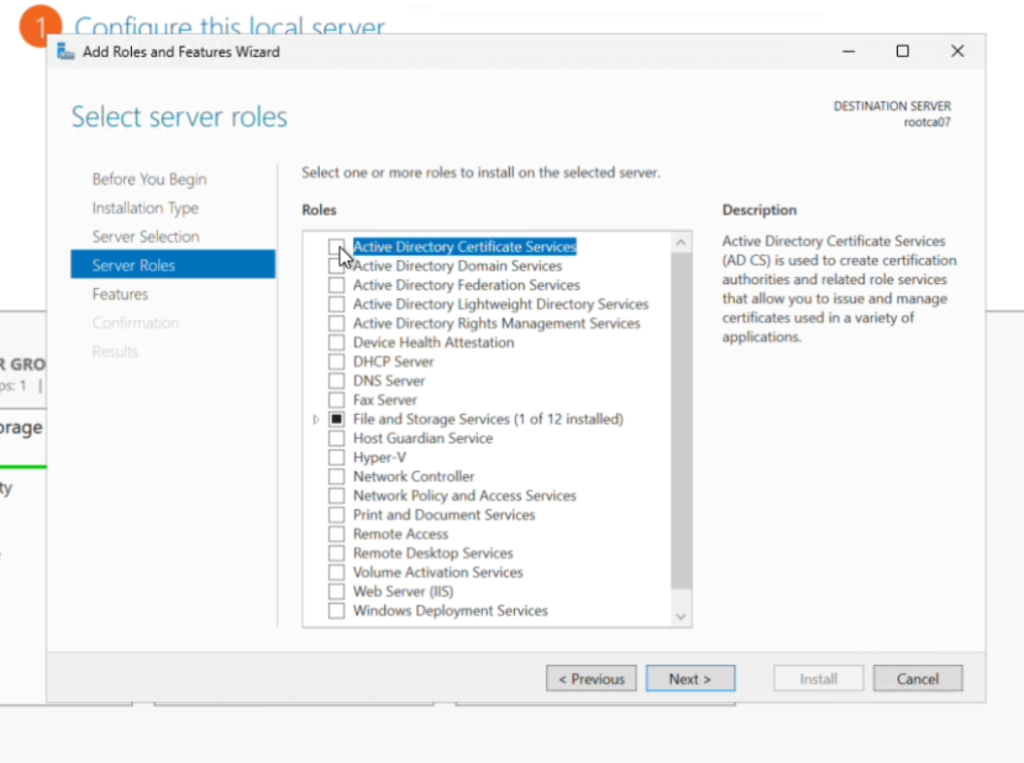
Server Manager > Add and Remove Roles > Select Active Directory Certificate Services
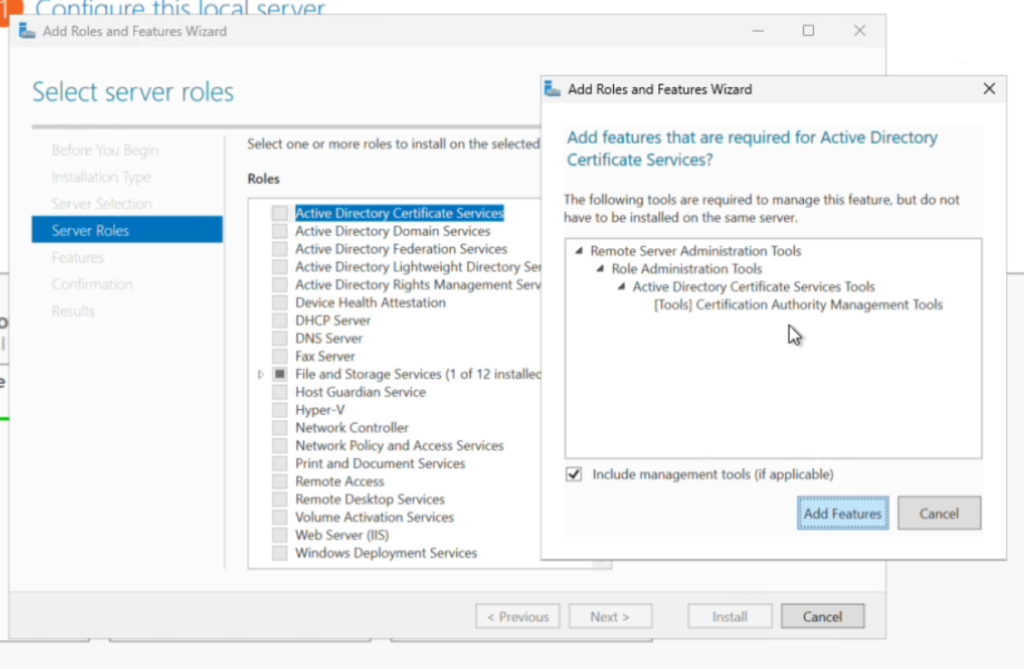
Add all default features
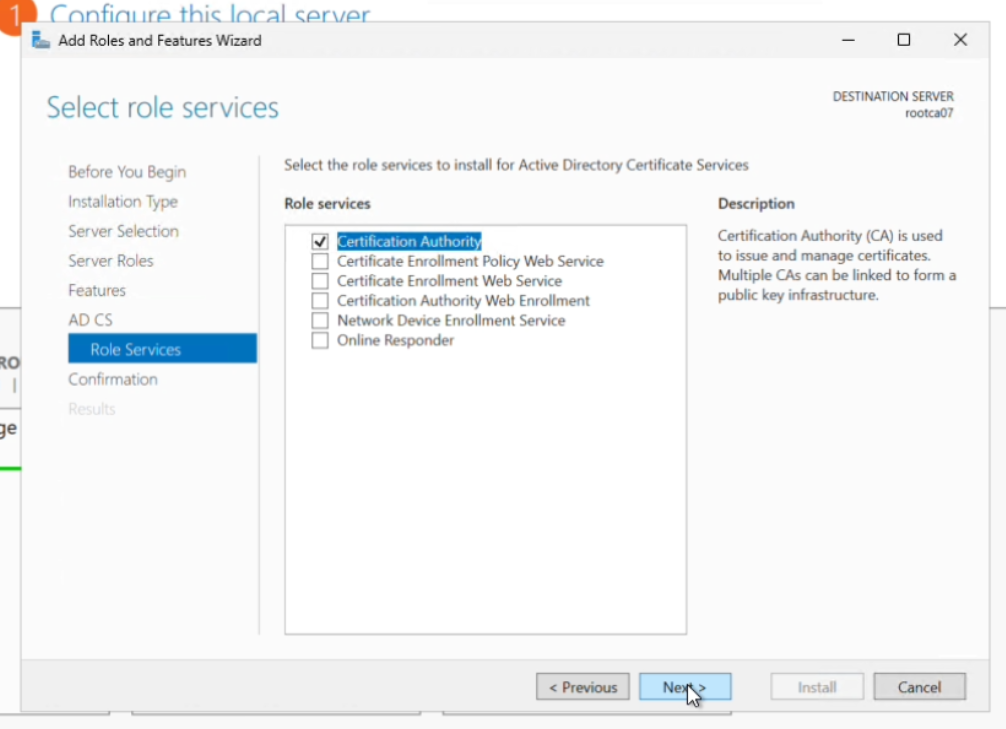
Select Certificate Authority > Next > Install
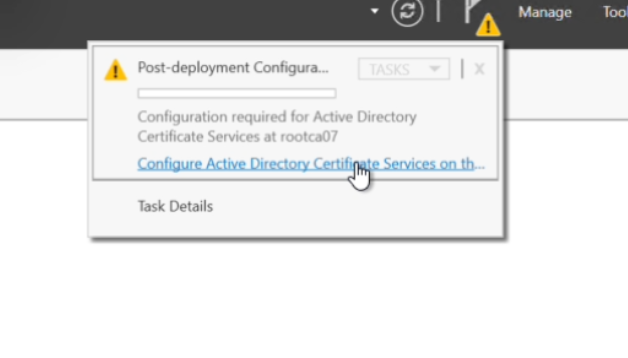
After role as been install the server will reboot. Select Manage > Configuer ADCS
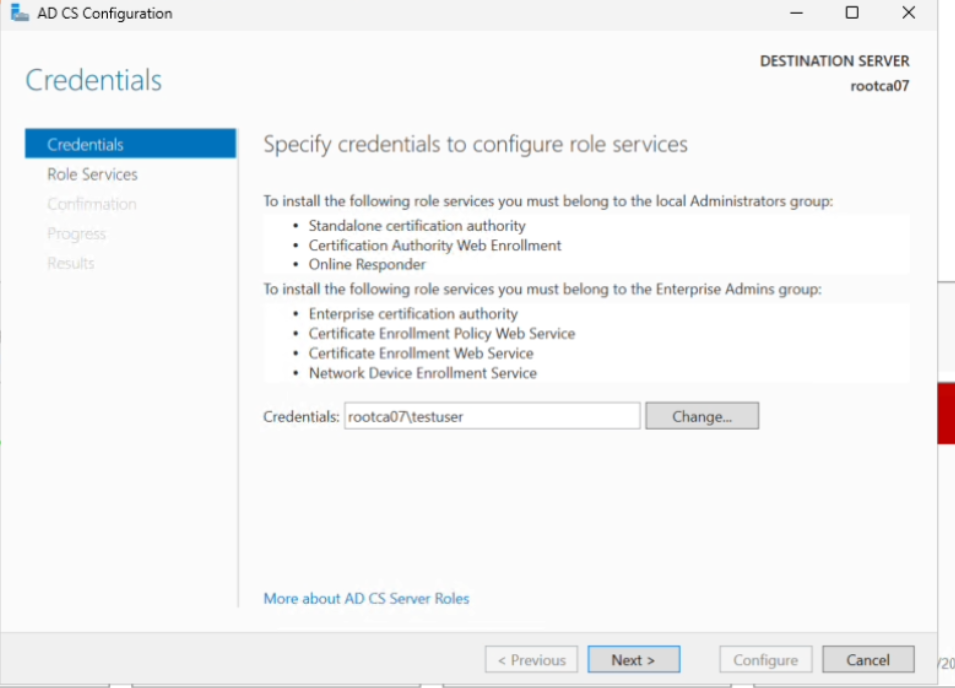
Credentials will be the admin of the server > Next
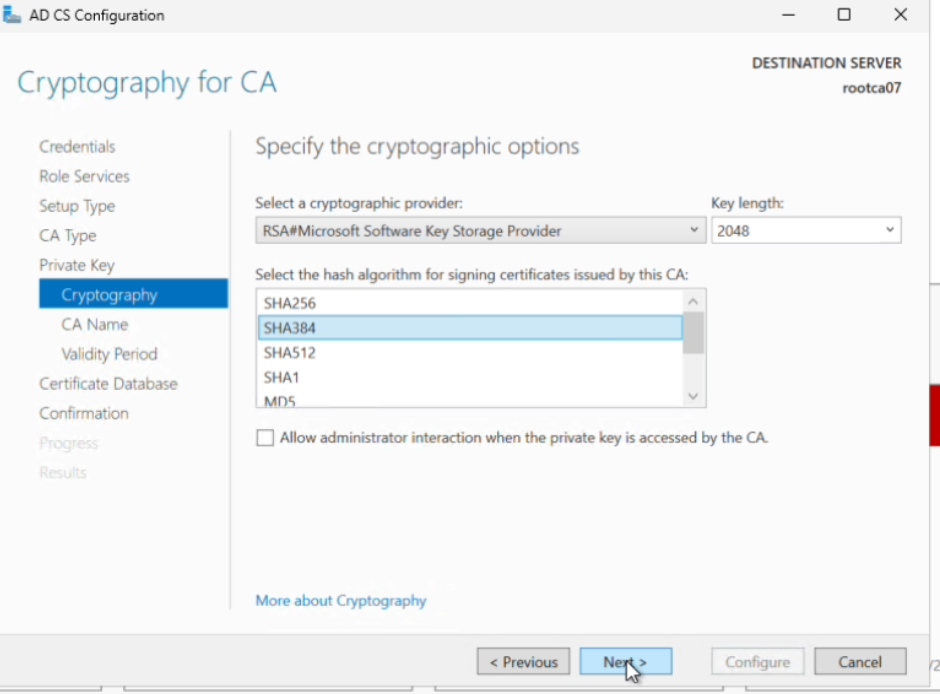
Select Role > Certificate Authority > StandAloneCA > rootCA> Create New Key private key
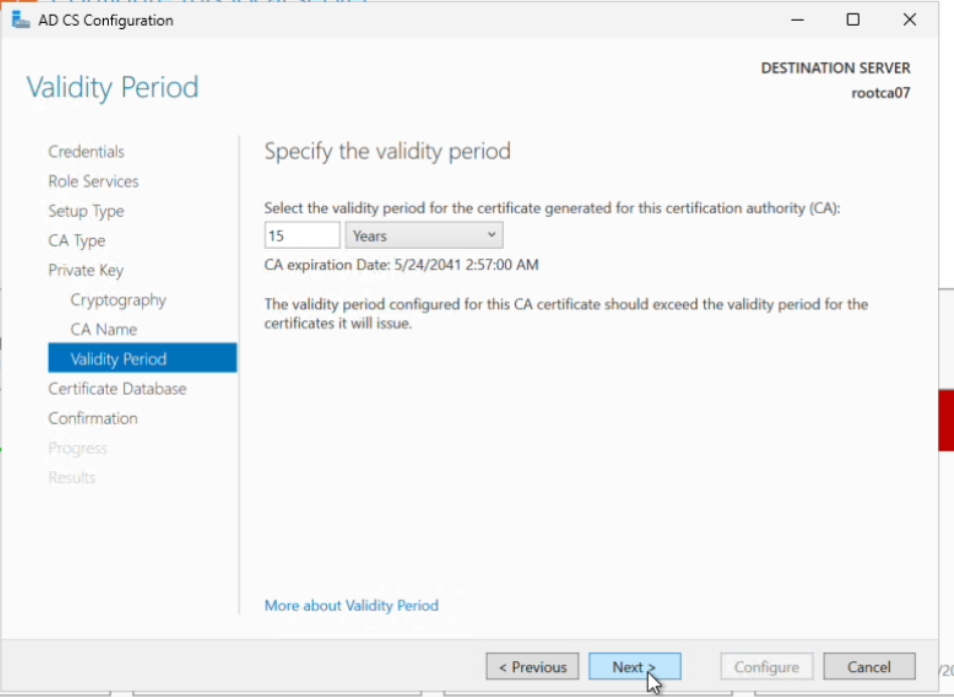
Provide a common name for the root CA> next > select validity period. > next > configure and close
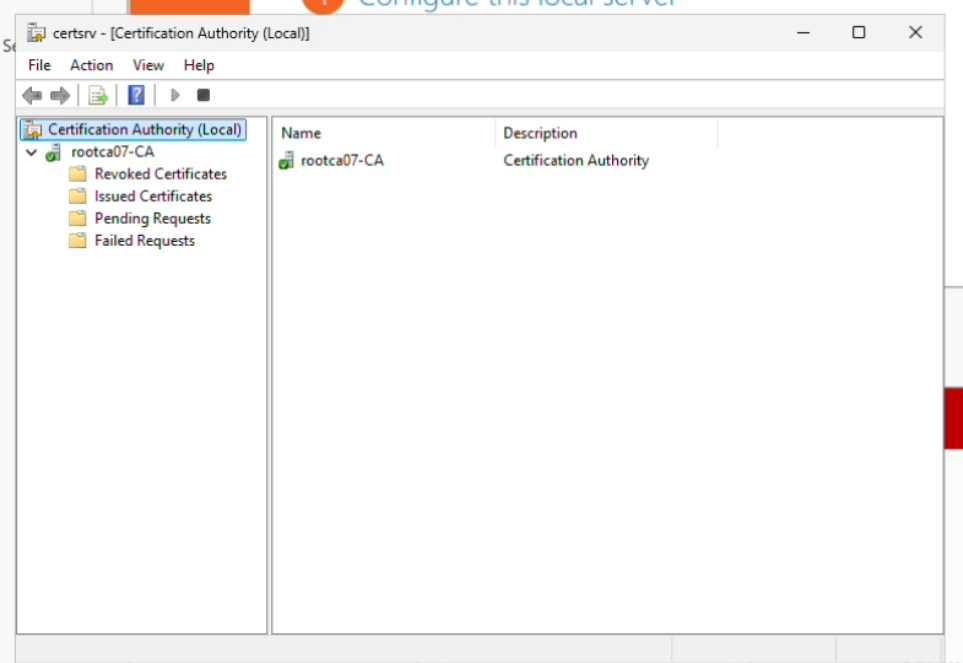
Once the role is installed. From Tools Open AD CS.
Space
Deploying Enterprise Subordinate. Installing the AD CS Role
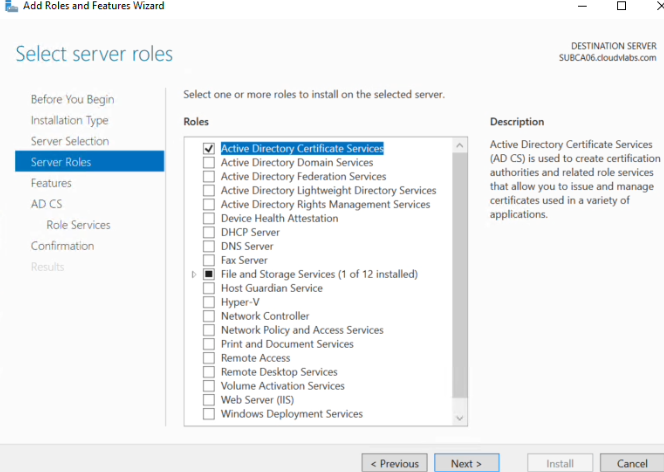
Server Manager > Add and Remove Roles > Select Active Directory Certificate Services
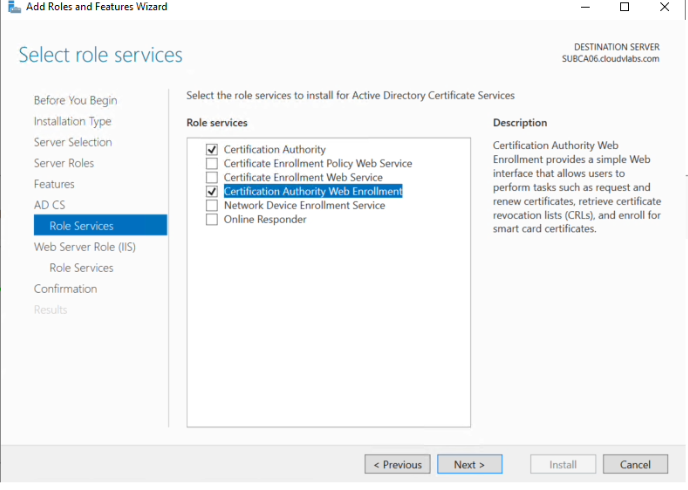
Next > Select roles > Certifcation Authority and Certficate Authority Web Enrollment > include all default features. Note: Web Enrollment will add the Web Server IIS services which is required
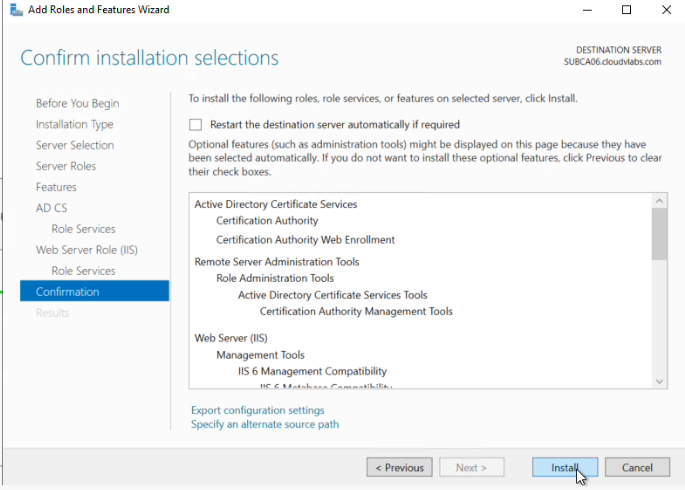
Select all default > Next and Install
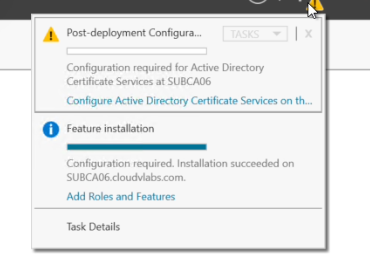
Once the all roles are installed and the server has restarted click on Post-deployment Configuration
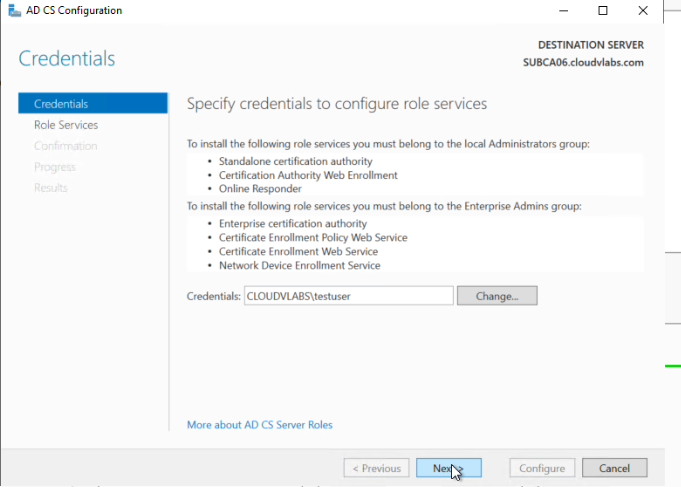
As this is an enterprise subordinate CA the user which is configuring the role is required to be an enterprise admin of the domain. Note: change the user from local admin to enterprise admin.
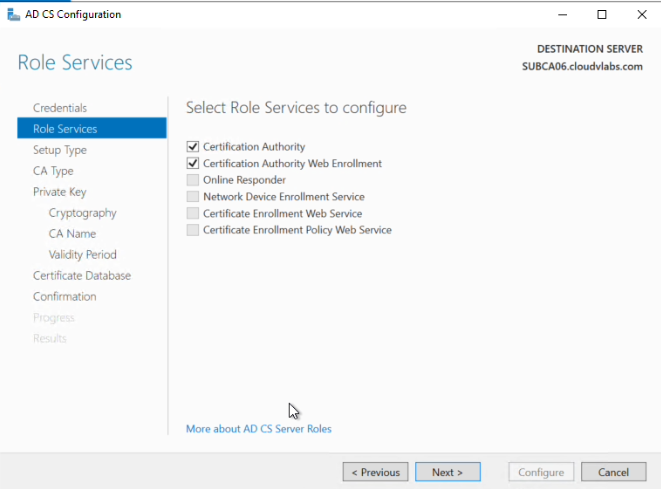
Select both Certifcate Authority and Web enrollment roles to configuer > next
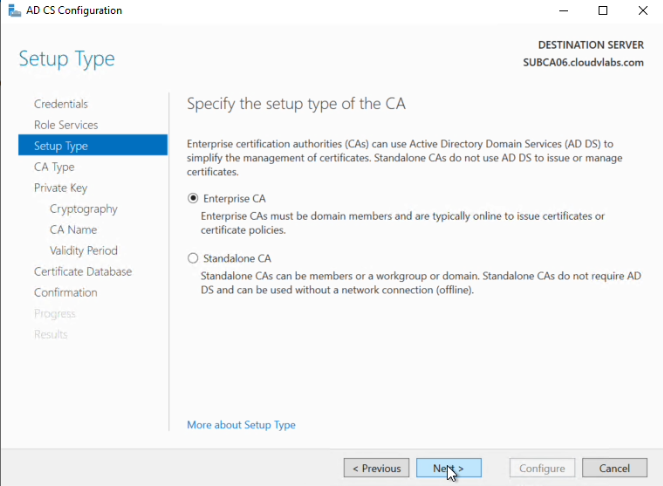
Select Enterprise CA and Select Subordinate CA > Next > Select create a new Private Key
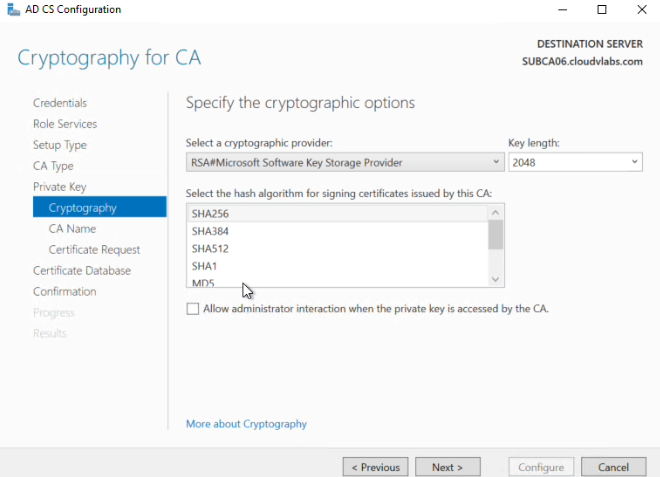
Select the algorithm. Note: the Algorithm used by the Subordinate CA will need to be the same as the ROOT CA. > Next
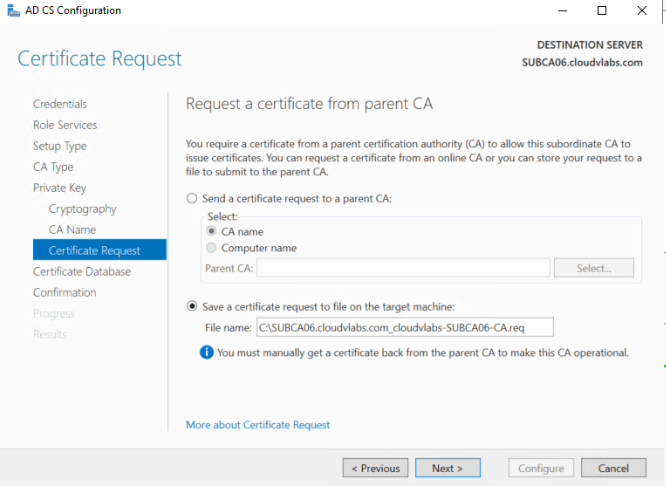
The next section will create a request file. This request file will need to be copied over to the Root CA . normally saved to the C: Drive. > Select Configure
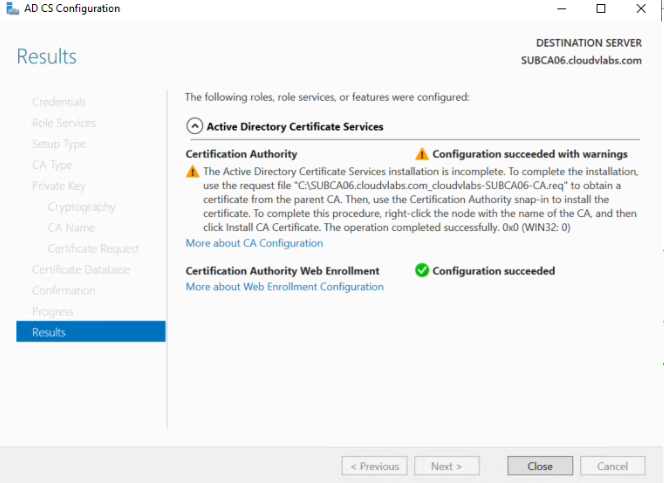
Note: the following output says the the Subordinate CA will only be opertional once it has a vaild certifcate from the root CA. This process build the trust relationship between the Root CA and the Subordinate CA
The pervious steps were to
- Install the root CA role
- Install the Subordinate role including Web Enrollment
The next section will aim to configuer the ROOT CA and the Subordinate CA
Root Certificate Server. Configuration Part2
Note: The following configuration is required before issuing any certificate
- CRL Location – or (CRL Distribution Point) is the publicly accessible web address or directory where a Certificate Authority (CA) publishes its Certificate Revocation List (CRL). A Certificate Revocation list (CRL) is a signed file maintained by a certificate authority that list certificates that have been canceled.
- AIA Location – Authority Information Access (AIA) points clients to the resources required to validate the certificate and build a complete chain of trust. Building a trust chain in a Public Key Infrastructure (PKI) is important it allows devices to verify that a security certificate is authentic and legitimate
- Client certificate validity period. Is the period that the issuing Certificate Authority (CA) certificates are validate for.
Configuring the CRL location
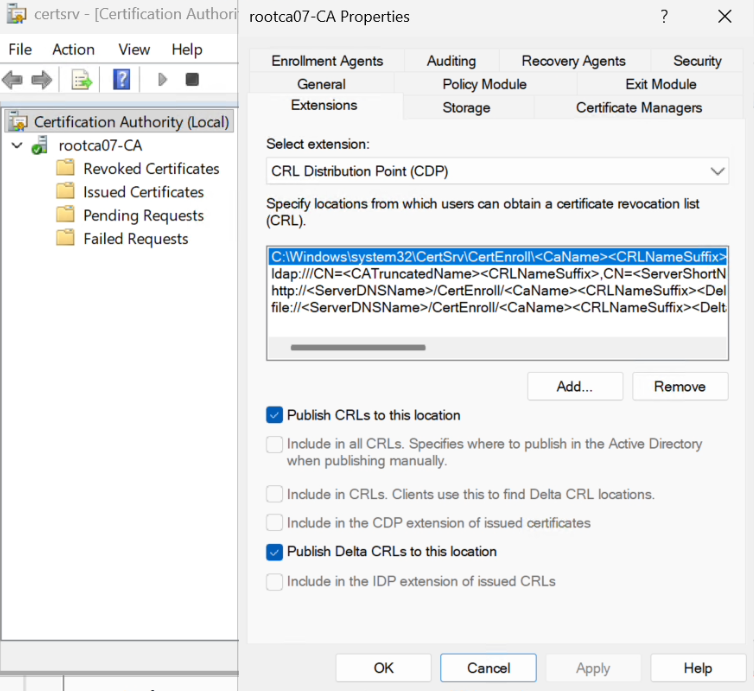
Connect to the Root CA and open AD CS. Right Click on your Root Server and select properties. Under Extensions TAB > you can select CRL extensions or AIA extensions. Select CRL.
As i will be using a HTTP location i have deleted all other location apart from the C:\location
Remove the following locations
- Ldap – location
- File – Location
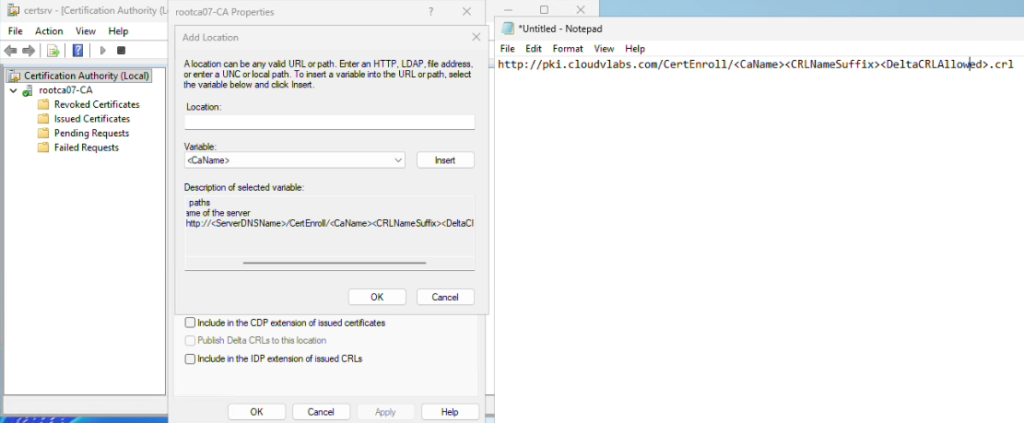
In the following example I have selected to use a HTTP location as the CRL. I have created CNAME record in DNS which will point to the server name, in this example it is http://pki.cloudvlabs.com.
In this step I have added the http location using the example > select http location > Insert. By using the example build out the correct location string. http://pki.cloudvlabs.com/certenroll/<CaName><CELNameStuffix><DeltaCRLAllowed.crl
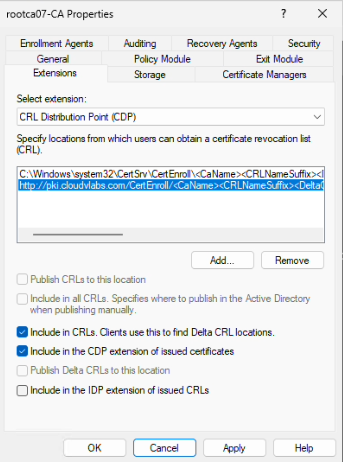
Enter the CRL location and select
- Include in CRL . Clients use this to find Delta CRL locations
- Include in the CDP extension of issued certificates
Configuring the AIA location
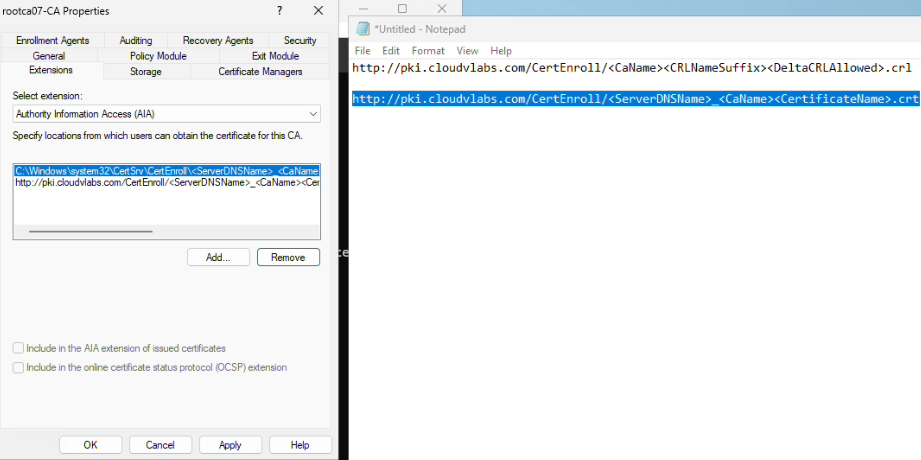
Next update the AIA location information. Select Authority Information Access (AIA)
Using the example replacing server name with the http location and remove all other locations apart from the C drive location
CRL Publishing Parameters
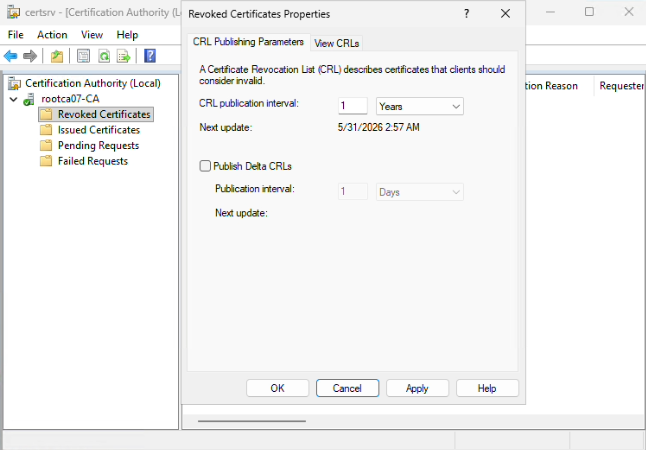
Right click on Revoked Certificates > Properties > change the CRL publication Interval to 1 year.
Issuing Certificate Validity Period.
By default, a Root CA certificate in AD CS is typically configured with a validity period of around 5 years, while certificates issued by a Standalone CA default to 1 year.
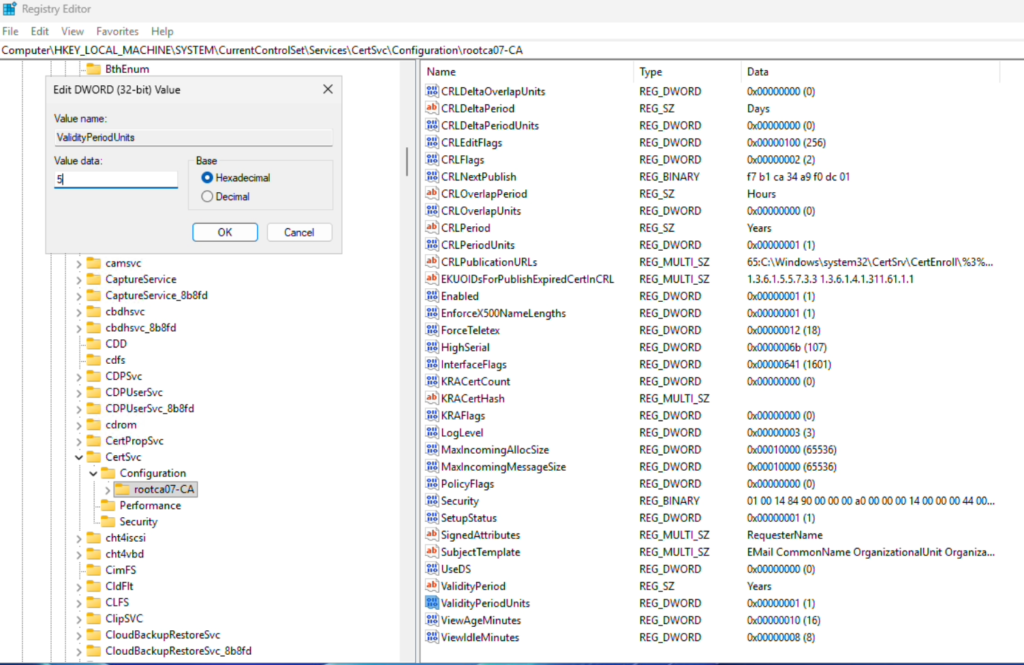
to change this setting. Open reg Editor and change the following value. Current Control Computer\HKEY_LOCAL_MACHINE\SYSTEM\CurrentControlSet\Config\ServerName and Edit the Validaity Period to (5)
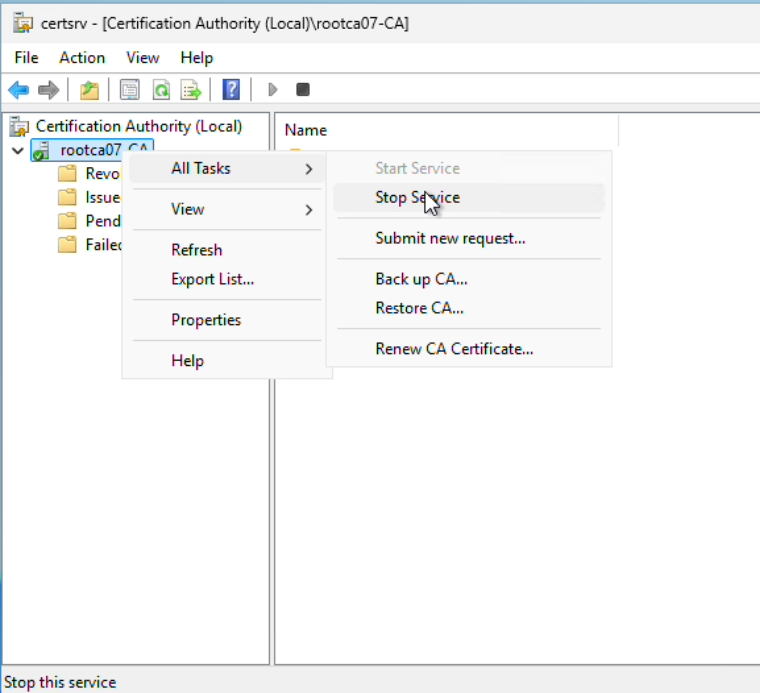
Start and Start ADCS service
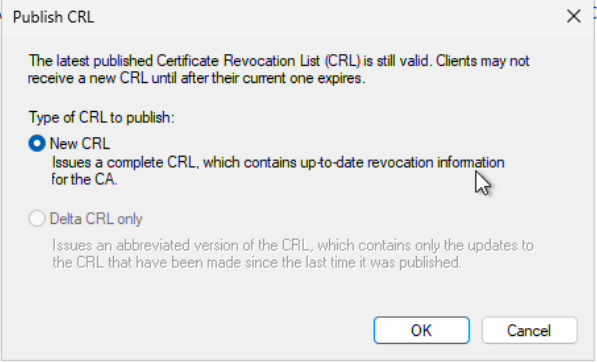
Publish new CRL. Right Click on Revoked Certifcates > Publish CRL
Once all configuration are completed on the ROOT certifcate server next step is to issue a certifcate to the Subordinate via the request file.
Config settings completed
- CRL Location
- AIA Location
- CRL Publishing internals
- Validity Period
Issuing a certificate via a request file
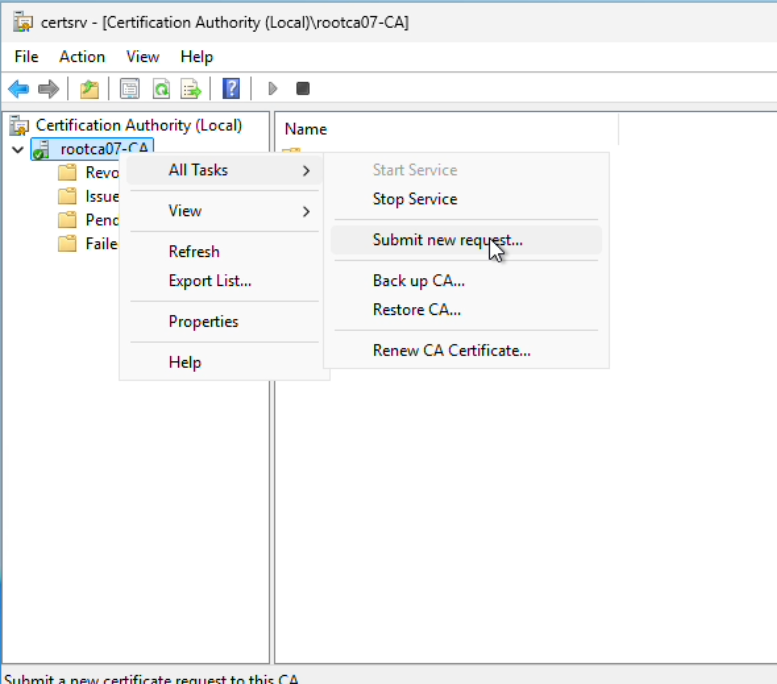
Right Click on the Root CA> All tasks > Submit a new request and select the request file.
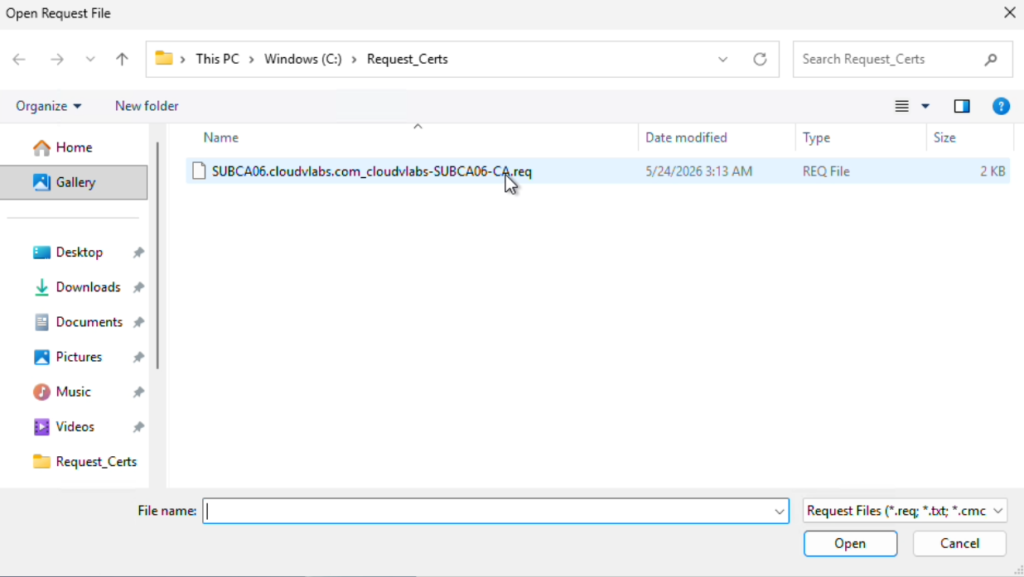
Select the request file
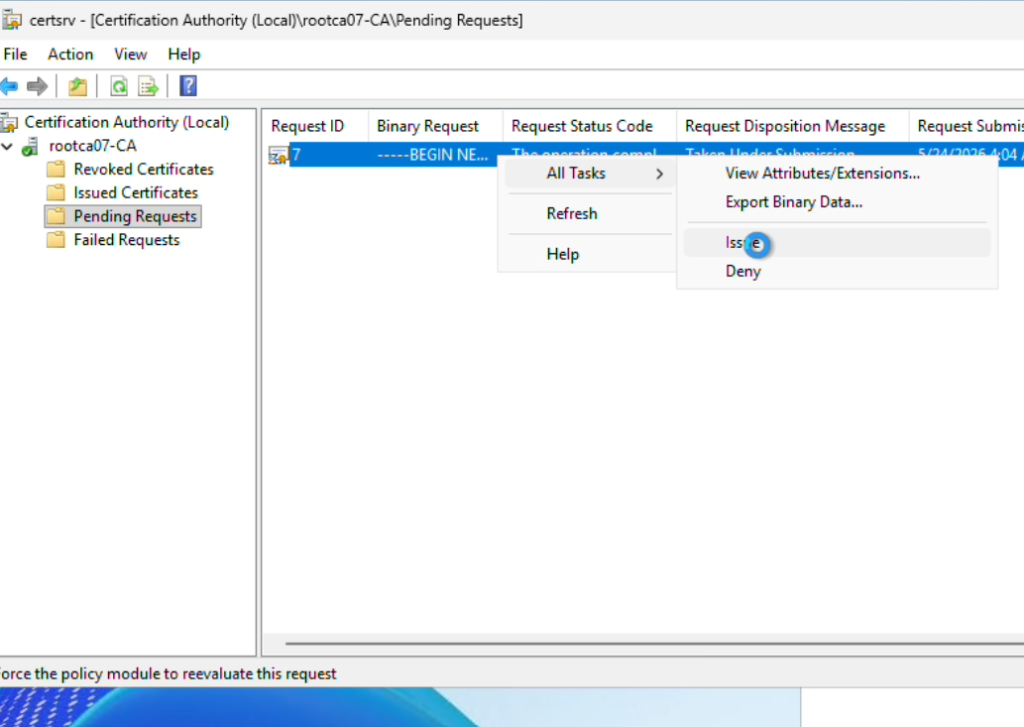
The request will be imported under the pending folder > Right Click on the certificate and select Issue.
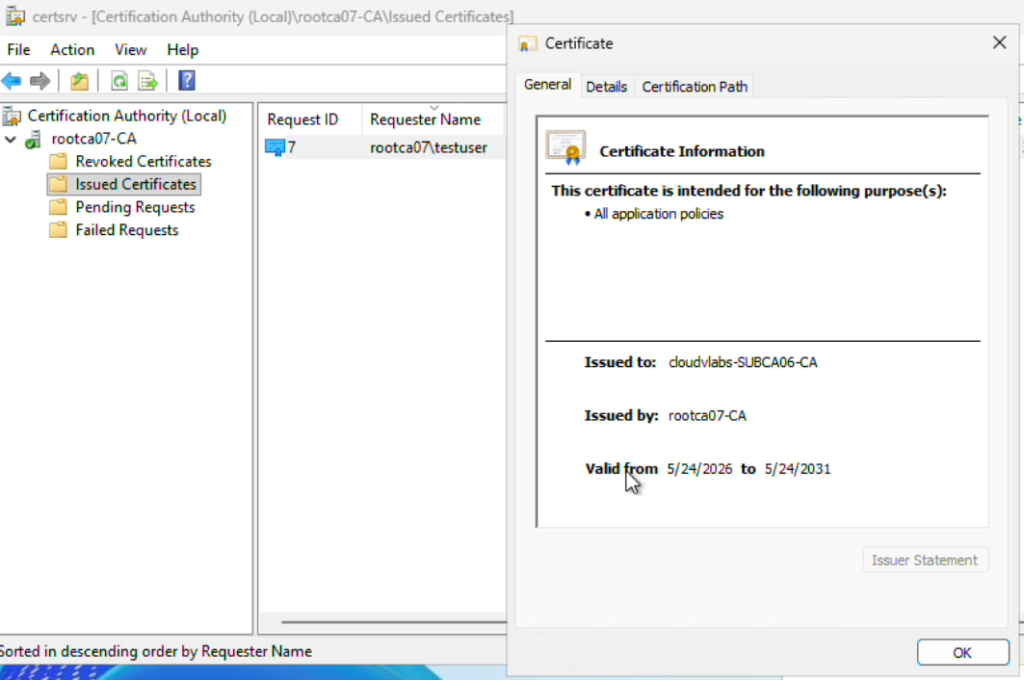
The issue certificate will be located under the Issued Certificates folder
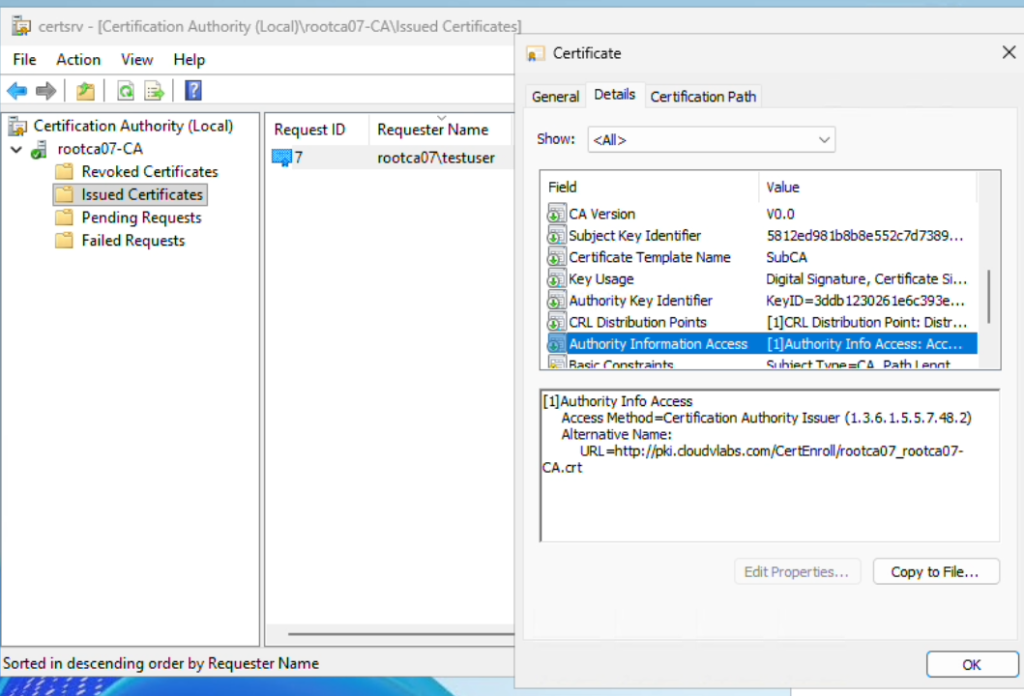
Select Details and and Copy the file
Copying the file is exporting the certificate. This will allow the certificate to be copied over to the Subordinate Server.
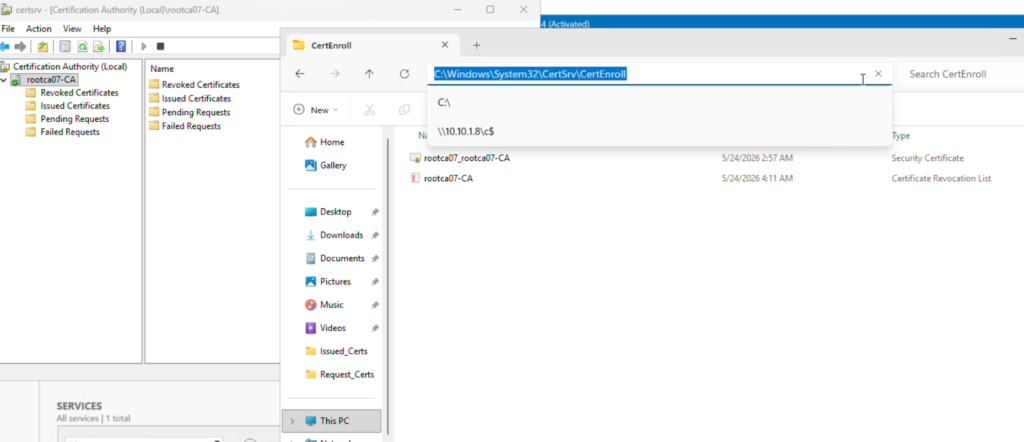
Both the Public Root Certificate and the CRL list will need to be copied over to the Subordinate
There are three files that need to be copied over to the Enterprise Subordinate,
- The exported Certificate which as been issued for the Subordinate.
- Public Root Certificate
- CRL list
- Validity Period
Configuring the Enterprise Subordinate CA Part 3
Copy files to IIS location
Clients will need to access the HTTP location to confirm and validate certificate information. This location will need to be will need to contain the 1) The Public Root Certificate 2) the CRL list. Both file are copied into the CertEroll location of the IIS Web Server.
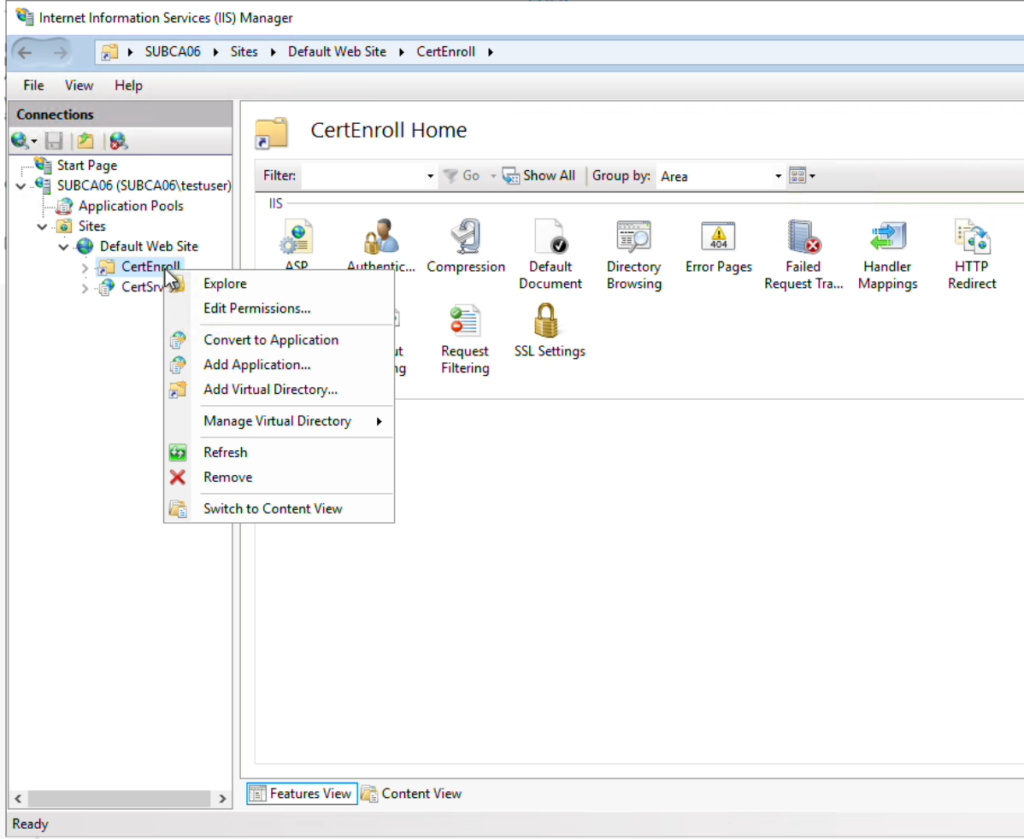
Open IIS > Right Click on CertEnroll and select explore
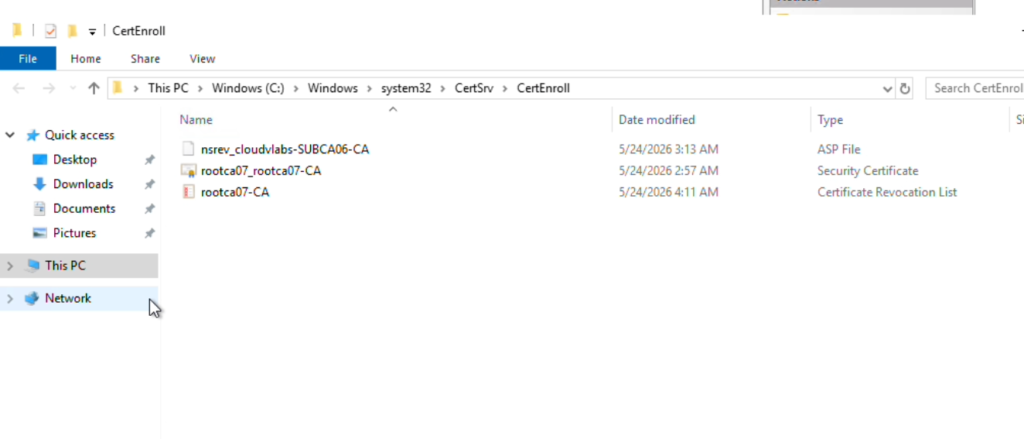
Copy both Root Public Certificate and CRL List to the location.
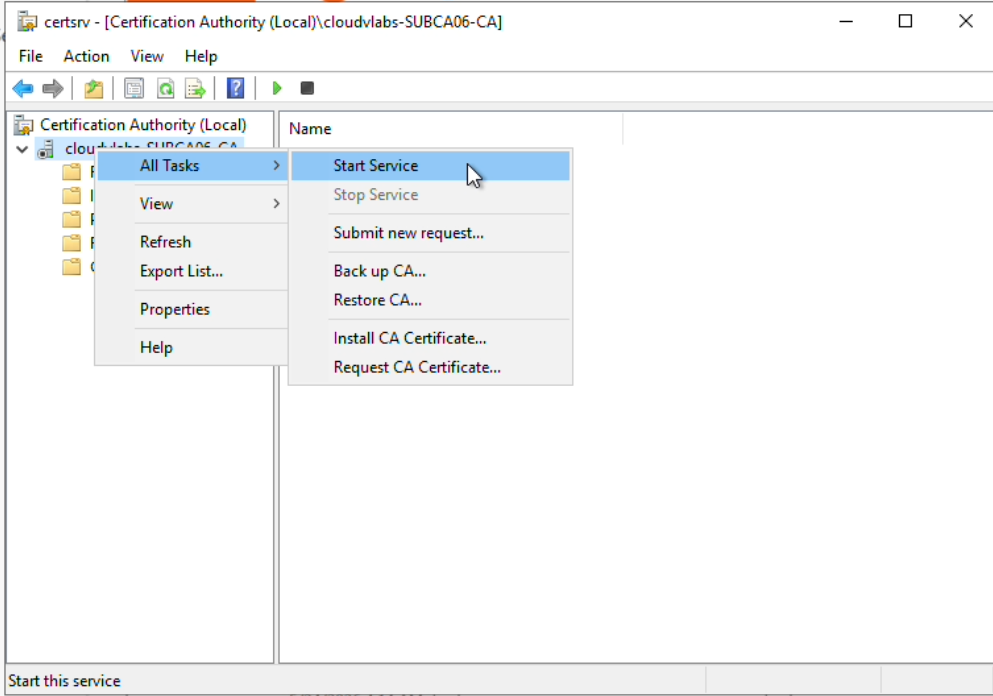
Open AD CS > Right Click on > All Task > Start Service
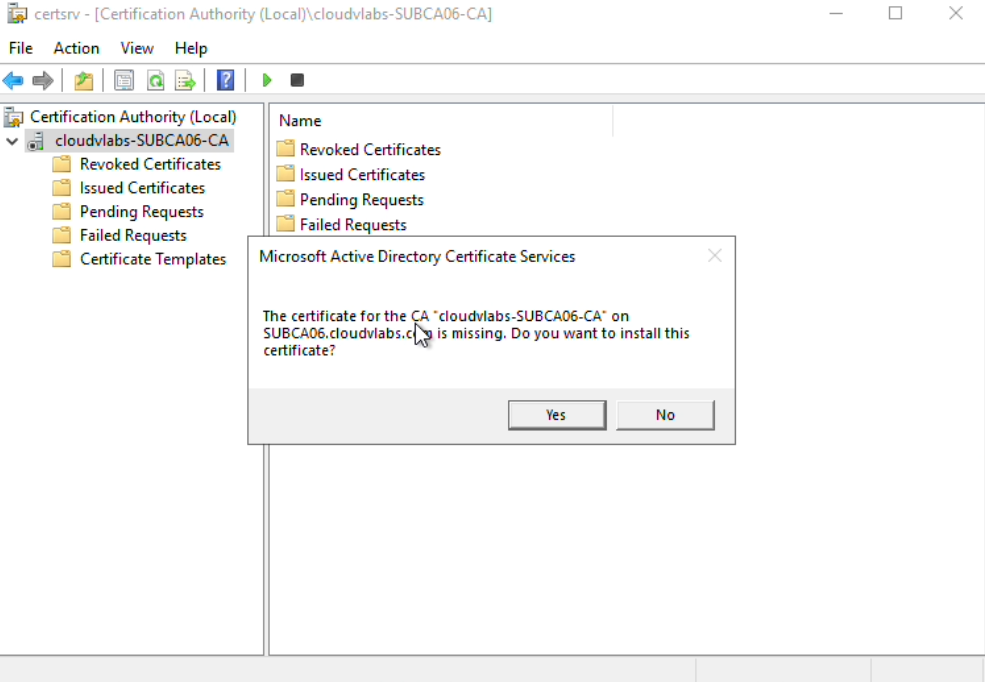
Select Yes > Install the certificate that has been issued by the Subordinate
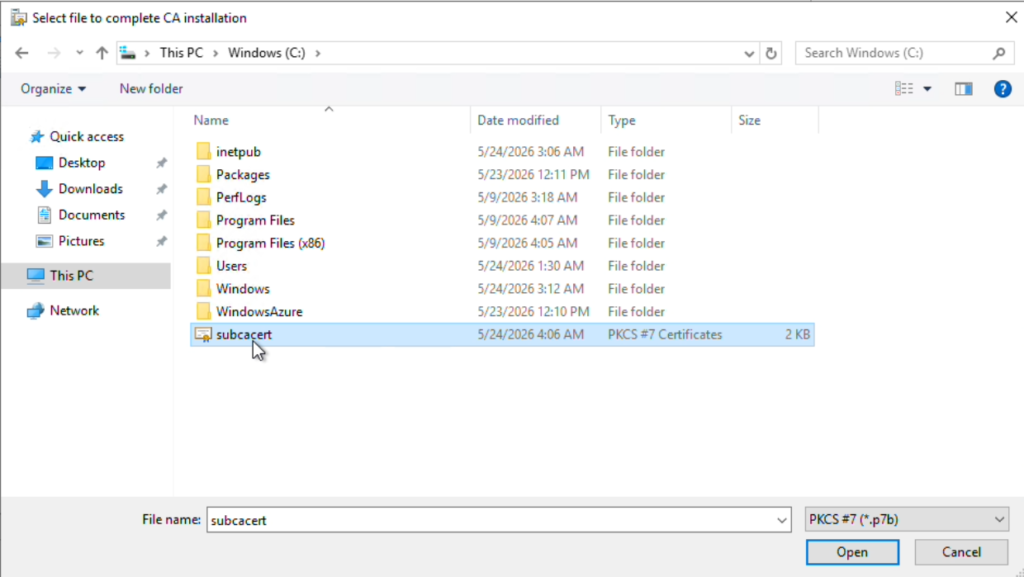
Select the certificate
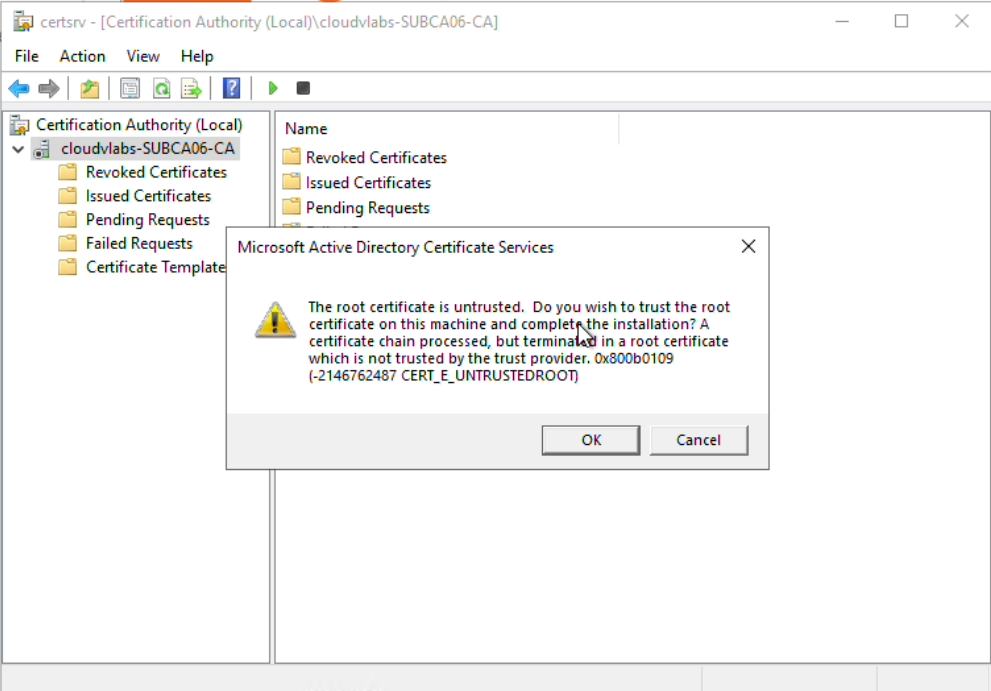
Trust the Certificate
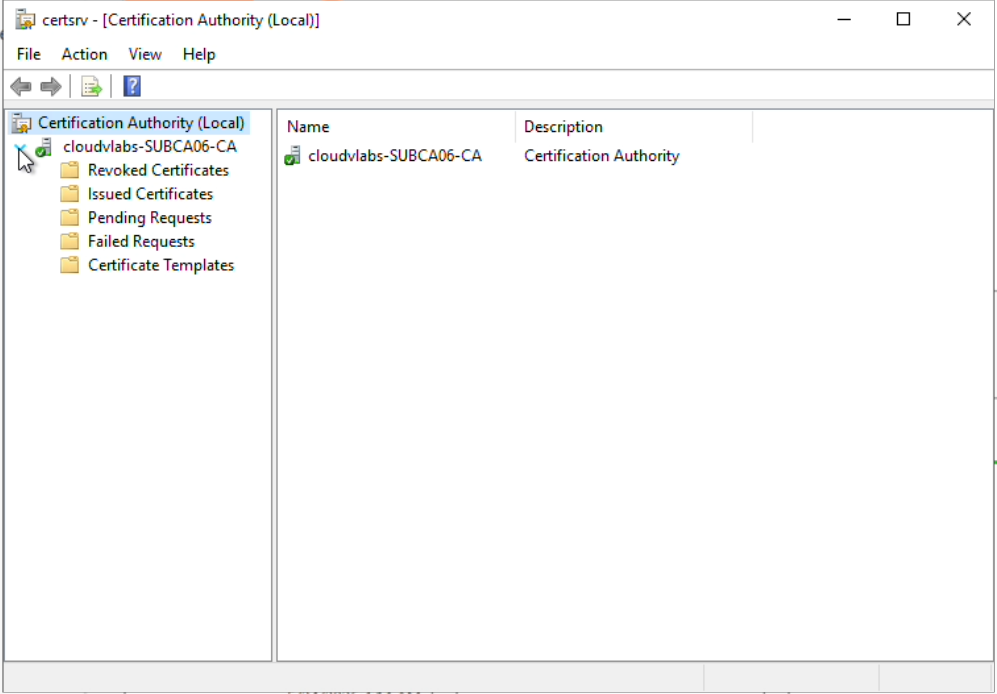
The Service will start and a Green Tick will show the service has started.
By default all member servers in the domain will be issued the certificate
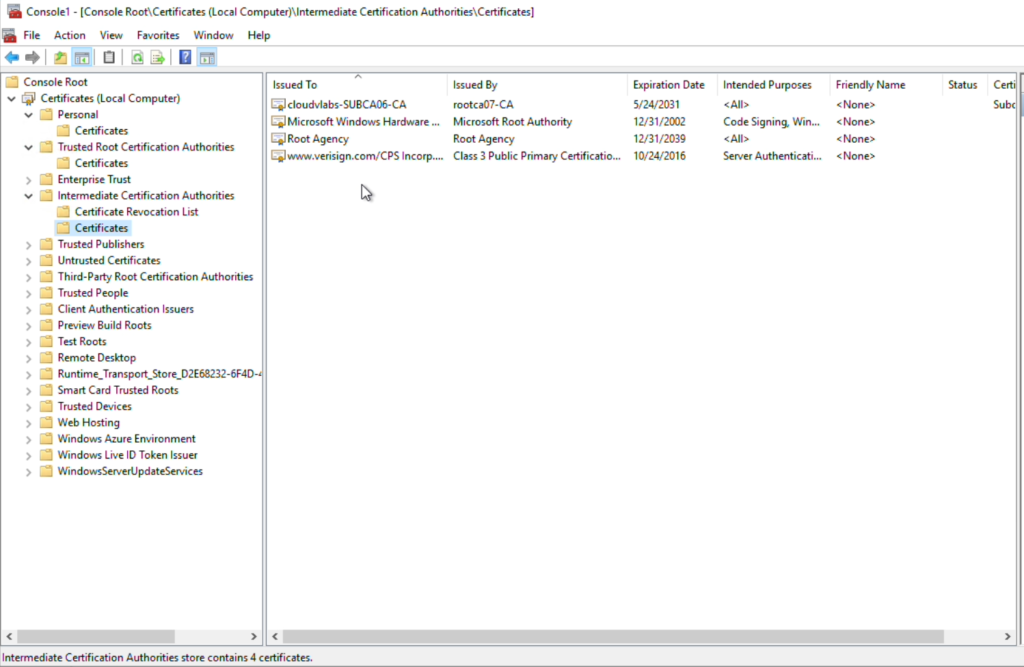
This can be confirm by logging on and checking the Intermediate Cert Folder
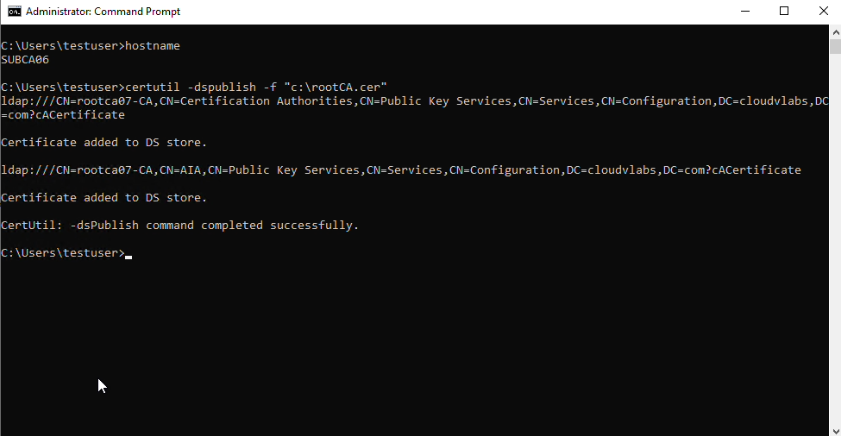
Publish Public Root Cert in AD
Certutil -dspublish -f "full file path.cer" RootCA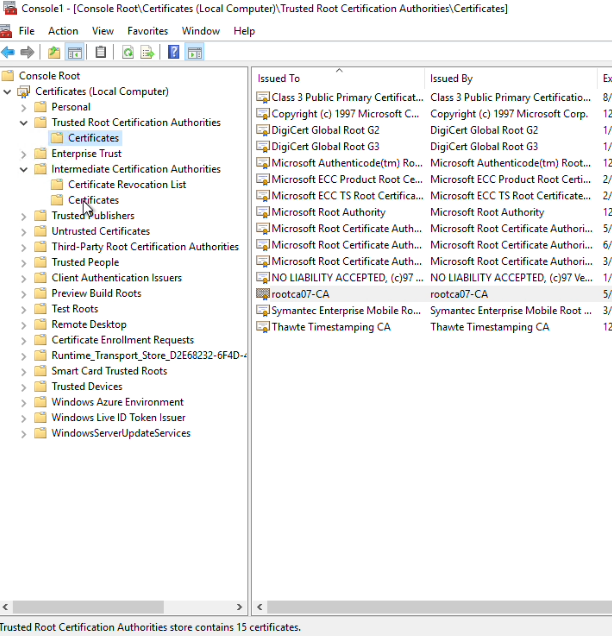
Publishing the Public Root Cert in AD will push the cert to all member servers. this can be confirmed by logging on to any member server and checking the Trusted Root Authorities servers
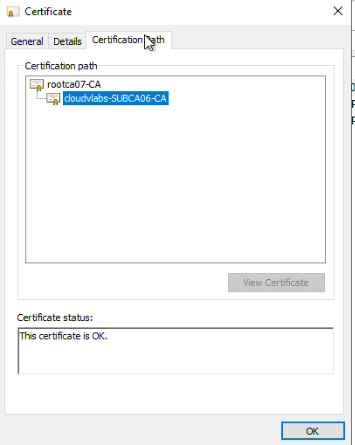
The end result is all domain servers will have a complete trusted chain.